Crochet Pattern

Written by: Alesha Reed
Created Summer 2022
**Created For Pumpkin Palooza 2022 Blog Hop**
Supplies:
Yarn: Four colors of worsted/Standard 4-weight Cotton
I used:
¹ Lily Sugar’n Cream: Cream -58 yards
² Peaches & Cream: Bright Orange – 8 yards
³ Lily Sugar’n Cream: Black – 4 yards
⁴ Lily Sugar’n Cream: Hot Green – 3 yards

Crochet Hook:
E (3.50 mm) hook
Other Supplies:
Scissors, Tapestry needle, Stitch markers, Measure tape,
8” to 10” stick
Optional Supplies:
(ideas of what to put in your pocket)
8oz Plastic Dixie Cup & 2” to 3” potted plant
Cinnamon sticks
Lavender or other dried flowers/Herbs
Your extra hooks
Whatever you want to store in your pumpkin pocket
Gauge swatch:
With E (3.50mm) hook and worsted weight cotton yarn:
Ch 17, Row 1: in 2nd bb from hook sc 16. Row 2 – 17: ch 1, turn, sc 16
Measures: 4” X 4”
**Gauge is not super important to match but will change the
Overall dimensions of your finished product
Measurements when the gauge is met:
Length 6 ½” X 6” Wide (without last border)
Notes:
-It can be beneficial to look through the entire pattern before starting.
-The pattern is written in standard US terminology and written working right-handed
-The ch 1 at the end or beginning of a row does not count as a stitch
-Pattern worked from the Bottom of the design to the top
-the little numbers next to the colors of yarn used, indicate the color that is indicated in the color change (example: CC2 means change to color orange)
-If you are not familiar with color changes see Color Change here is a quick video: https://www.tiktok.com/@crafty_lesha/video/7118804380924546350?is_from_webapp=1&sender_device=pc&web_id=7086900725129217578
-Large Graph of the pumpkin is in the downloadable pdf file
-you can crochet your starting tail in so it is not in the way later, like in this video: https://www.tiktok.com/@crafty_lesha/video/7119627303809748266?_t=8Tw0CypWoFH&_r=1
Abbreviations:
ch - chain
slst - slip stitch
sc - single crochet
sk - Skip. Skip the number of stitches of the previous row that is indicated
dc - double crochet
linked dc - linked dc is a dc that picks up the 1st loop through the side bar of the previous dc, video for help with the linked dc:
hdc - half double crochet
Puff - Puff stitch, yarn over and pull a loop 3 times, yarn over and pull through all 7 loops on hook, video for puff stitch: https://www.tiktok.com/@crafty_lesha/video/7119532623273233710?_t=8TvX8rnnCdW&_r=1
Stitch Location
bb - Back Bump. The back side of the chain, the 3rd loop, when worked in forces the main two loops to one side.
BLO - Back loop only
FLO - Front loops only
WS - Wrong Side. Side that will not be seen, this is the side you keep your tails on.
RS - Right Side. Side that will be seen
Other important information
Row
Row: working back and forth
Rnd
Round: working entire circumference of piece. This could mean working in the side bars of previous rows made.
sN vs Ns
If the number is before the stitch, that number of stitches in one stitch. if the number is after the stitch, that stitch is done over that number of stitches of previous row. Example 5dc = 5 dc in next stitch, dc 5 = dc over the next five stitches
[ sN, sN ] x N
Do what is between the brackets ( […] ) for the indicated number of times (x N). example [sc 1, 2dc, tr 1] x 5: you would single crochet, two double crochet, treble crochet and repeat that sequence five times for a total of 20 stitches across the 15 stitches of the previous row.
CC
Color Change, switching which color yarn is the working color
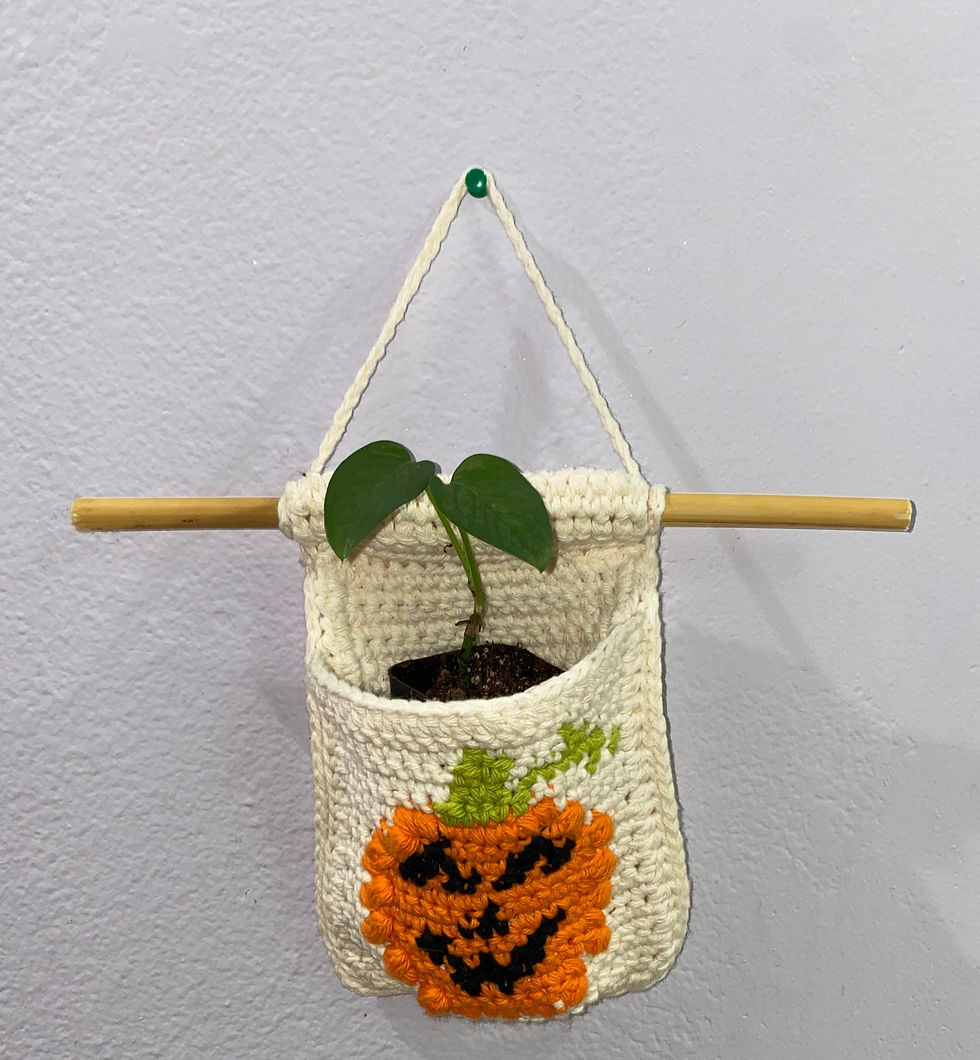
Pumpkin Pocket for Plant:

Starting with Cream Color
Ch 22
Row 1: in 2nd bb from hook, sc 21, ch 1, turn (21)
Row 2: sc 7, CC2- [puff, sc 1]x3, puff, CC1-sc 7, ch 1, turn (21)
Row 3: sc 6, CC2-puff, sc 7, puff, CC1-sc 6, ch 1, turn (21)
Row 4: sc 5, CC2-puff, sc 3, CC3-sc 1, CC2-sc 1, CC3-sc1, CC2-sc 3, puff, CC1-sc 5, ch 1, turn (21)

Row 5: sc 4, CC2-puff, sc 3, CC3-sc 5, CC2-sc 3, puff, CC1-sc 4, ch 1, turn (21)
Row 6: sc 3, CC2- puff, sc 3, CC3- sc 2, CC2, sc 1, CC3-sc 1, CC2-sc 1, CC3-sc 2, CC2-sc 3, puff, CC1-sc 3, ch 1, turn (21)
Row 7: sc 3, CC2-puff, sc 2, CC3-sc 2, CC2-sc 5, CC3-sc 2, CC2-sc 2, puff, CC1-sc 3, ch 1, turn (21)
Row 8: sc 3, CC2-puff, sc 5, CC3-sc 3, CC2-sc 5, puff, CC1-sc 3, ch 1, turn (21)

Row 9: sc 3, CC2-puff, sc 6, CC3-sc 1, CC2-sc 6, puff, CC1-sc 3, ch 1, turn (21)
Row 10: sc 3, CC2-puff, sc 13, puff, CC1-sc 3, ch 1, turn (21)
Row 11: sc 3, CC2-puff, sc 1, CC3-sc 2, CC2-sc 1, CC3- sc 2, CC2-sc 1, CC3-sc 2, CC2-sc 1, CC3- sc 2, CC2-sc 1, puff, CC1-sc 3, ch 1, turn (21)
Row 12: sc 4, CC2-puff, sc 1, CC3-sc 3, CC2-sc 3, CC3- sc 3, CC2-sc 1, puff, CC1-sc 4, ch 1, turn (21)
Row 13: sc 5, CC2-puff, sc 1, CC3-sc 1, CC2-sc 5, CC3- sc 1, CC2-sc 1, puff, CC1-sc 5, ch 1, turn (21)
Cut, tie, and weave in end of Black (CC3)
Note: you can leave a long tail of Black (color 3) to clean up lines of color changes by embroidering the sides of the stitches at the color change junctions.
Row 14: sc 6, CC2-puff 2, sc 5, puff 2, CC1-sc 6, ch 1, turn (21)
Cut, tie, and weave in end of Orange (CC2)
Row15: sc 8, CC4-hdc 1, sc 3, hdc 1, CC1-sc 4, CC4-hdc 1, CC1-sc 1, CC4-hdc 1, CC1-sc 1, ch 1, turn (21)
Row 16: sc 2, CC4-hdc 1, sc 5, CC1-sc 1, CC4-hdc 1, sc 1, hdc 1, CC1-sc 9, ch 1, turn (21)
Row 17: sc 9, CC4-hdc 1, sc 1, hdc 1, CC1-sc 3, CC4-sc 2, CC1-sc 4, ch 1, turn (21)
Row 18: sc 5, CC4-hdc 1, CC1-sc 4, CC4-hdc 1, CC1-sc 10, ch 1, turn (21)
Cut, tie, and weave in end of Green (CC4)
Note: you can leave a long tail of Green (color 4) to clean up lines of color changes by embroidering the sides of the stitches at the color change junctions.
Row 19: sc 21, ch 1, turn (21)
Rnd 20: hdc 20 (across top), 3hdc (in corner stitch, place stitch marker in 2nd hdc), hdc 18 (down side), 3hdc (in corner stitch, place stitch marker in 2nd hdc), hdc 19 (across bottom), 3hdc (in corner stitch, place stitch marker in 2nd hdc), hdc 18 (up side), 2hdc (in first corner stitch, place stitch marker in 2nd hdc), slst into 1st stitch, cut, tie and weave in ends. (86 stitches)
Base of Wall Hang:
In Cream Color, or Color of Choice
Ch 17
Row 1: in 2nd bb from hook, sc 16, ch 1, turn (16)
Row 2 – 22: sc 16, ch 1, turn (16)
Rnd 23: hdc 15 (across top), 3hdc (in corner stitch, place stitch marker in 2nd hdc), hdc 21 (down side), 3hdc (in corner stitch, place stitch marker in 2nd hdc), hdc 14 (across bottom), 3hdc (in corner stitch, place stitch marker in 2nd hdc), hdc 21 (up side), 2hdc (in first corner stitch, place stitch marker in 2nd hdc), slst into 1st stitch, pull slst tight.
Row 24: ch 1, (no turn), work one stitch back (the last hdc made of Rnd 23) BLO-hdc 18 (18)
Row 25 – 29: ch 2, turn, linked-dc 18 (18)
Row 30: Fold toward the front loops of Row 24, slst BLO of row 29 to FLO of row 24, do not cut or tie continue on to assembly. (18)
Assembly:
No turning or ch after last slst of previous section, slst 2, place pocket over base with RS of pocket facing out, BLO of Pocket and FLO of Base- sc 21 (starting in the stitch marked corner of pocket, working down side), 3sc (in corner), sc 2, [skip 1 pocket stitch only, sc 3]x4, skip 1 pocket stitch only, sc 2 (across bottom), 3sc (in corner), sc 21 (upside), slst 2, slst into next stitch of the base only, pull tight, (if you want a hanging strap in the same color, wait to cut) cut, tie and weave in end. (72)
Hanging Strap:
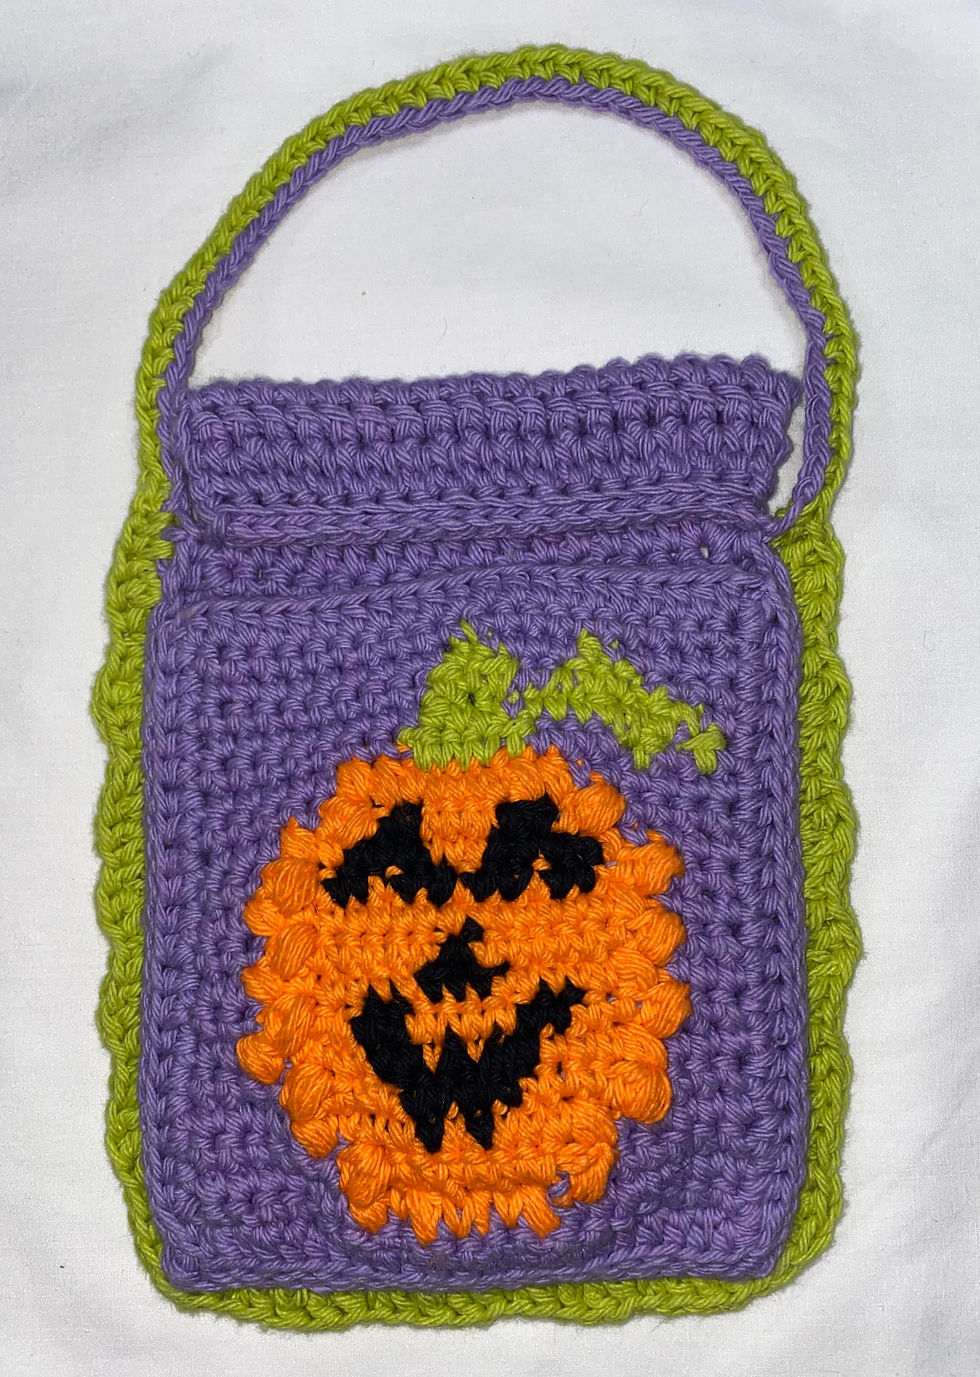
If you want a hanging strap in the same color as your Assembly border, ch 50 and slst into top corner of opposite side.
If you want a hanging strap in another color, slst into top corner of base, ch 50 and slst into top corner of opposite side.
Embellishment Options:

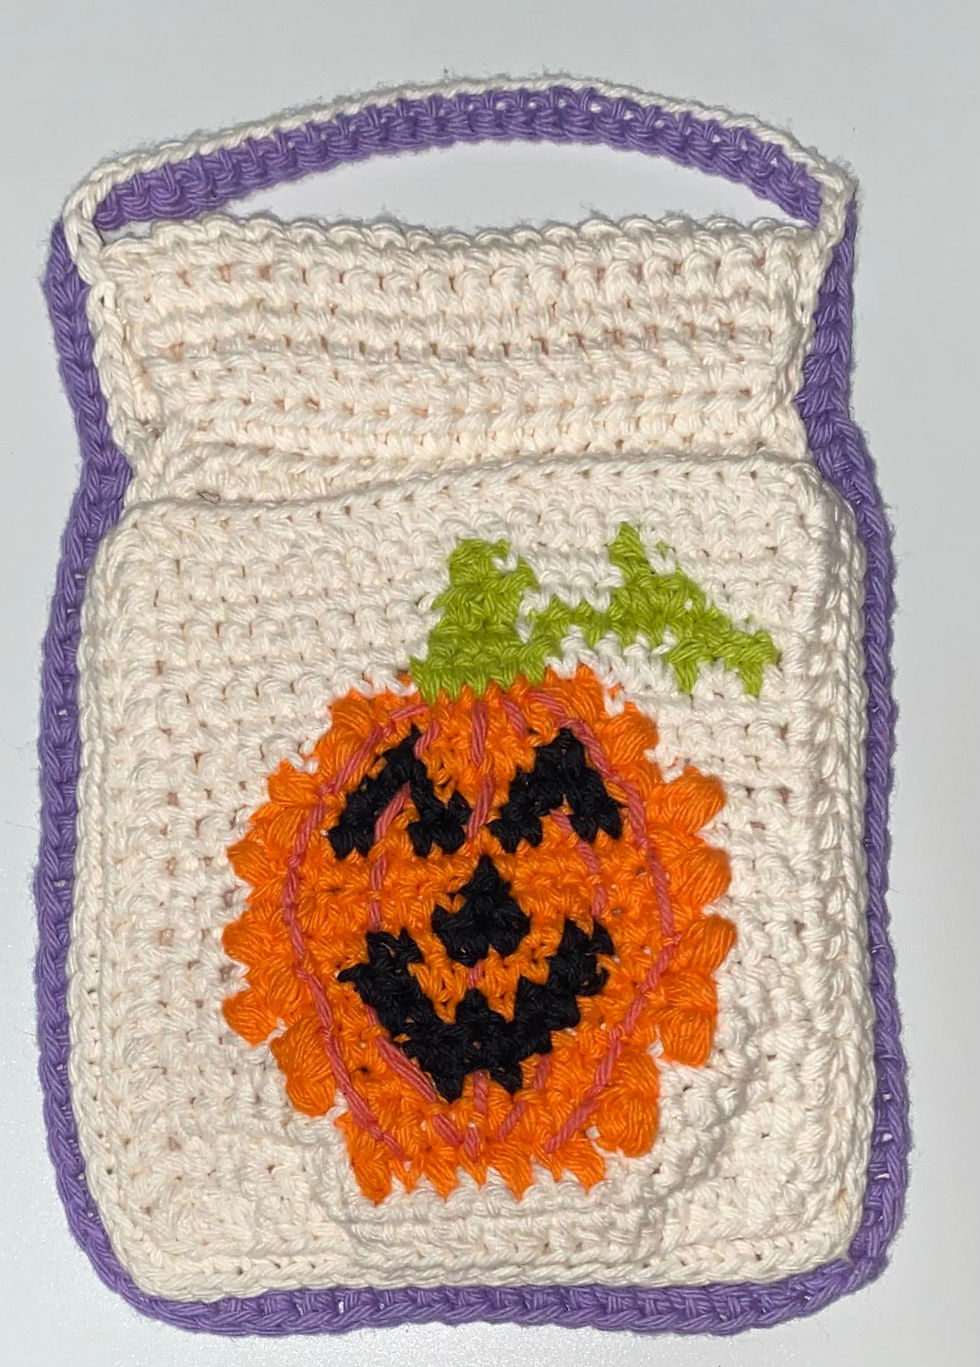
Border:
in your chosen border color- slst into to center corner hdc of Base on the left side, in BLO [sc 1, hdc 1, dc2, hdc 1] x18, sc 1, slst in top center corner hdc of right side.

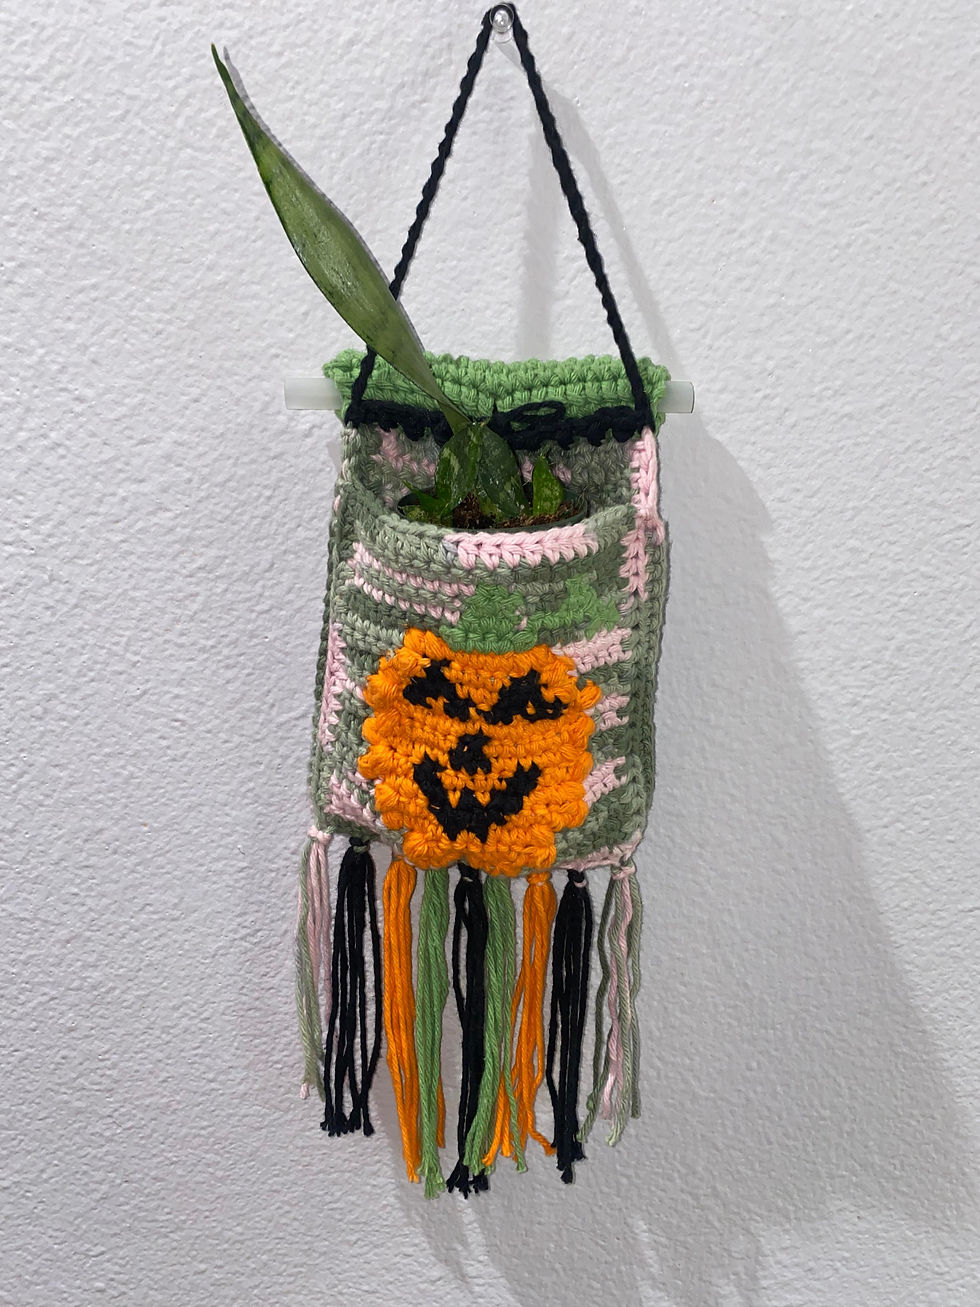
Fringe:
cut 12inch pieces of yarn, holding 3 pieces of yarn, fold in half, loop through bottom stitch and pull ends of pieces through the loop. Do this about every 3rd or 4th stitch
Cinnamon stick bundle for the corner:
with 12” piece of cotton yarn wrap three cinnamon sticks together and tie securely, weave ends of cotton ties through the corner sc side bars and back up and around cinnamon stick bundle, tie secure and make a bow.

Indent lines for the pumpkin: in contrast color emborder lines along the pumpkin face to create the look of pumpkin ridges.
Additional Options:
Add 2” plant
Add a bundle of dried lavender or fun died flower arrangement
Your extra crochet hooks
Or whatever you would like to keep in the pocket of your new wall hang

Happy Fall!
I hope you have enjoyed making your Pumpkin Pocket Wall-Haning
I would love to see your makes, tag me @Crafty_Lesha


😊HOW CUTE, I am thinking a little girls Halloween purse,( with adjustments) thank you